Tutorial: Your First Delivery
Time: ~13 minutes (5 steps)
Platform: macOS, Linux, or Windows
Prerequisites: Python 3.10+, Claude Code with nWave installed
Dependencies: None beyond pytest. Pure Python.
Important: Create your project in a permanent directory (not /tmp). Later tutorials build on this project's artifacts.
Setup
Run from a directory where you want the tutorial project created (e.g. ~/projects):
curl -fsSL https://raw.githubusercontent.com/nWave-ai/nWave/main}/docs/guides/tutorial-first-delivery/setup.py | python3Prefer to read first? See manual-setup.md.
After setup you should have
- A
tutorial-ascii-art/directory containingsrc/ascii_art/__init__.py,tests/test_ascii_art.py,tests/fixtures/diagonal.ppm, andpyproject.toml - A
.venv/virtual environment withpytestinstalled - Three failing acceptance tests in
tests/test_ascii_art.py(runpytest tests/ -vto confirm)
What You'll Build
An image-to-ASCII-art converter. Give it any photo, get ASCII art in your terminal.
Before — Einstein's 1947 portrait (public domain, photo by Oren Jack Turner):
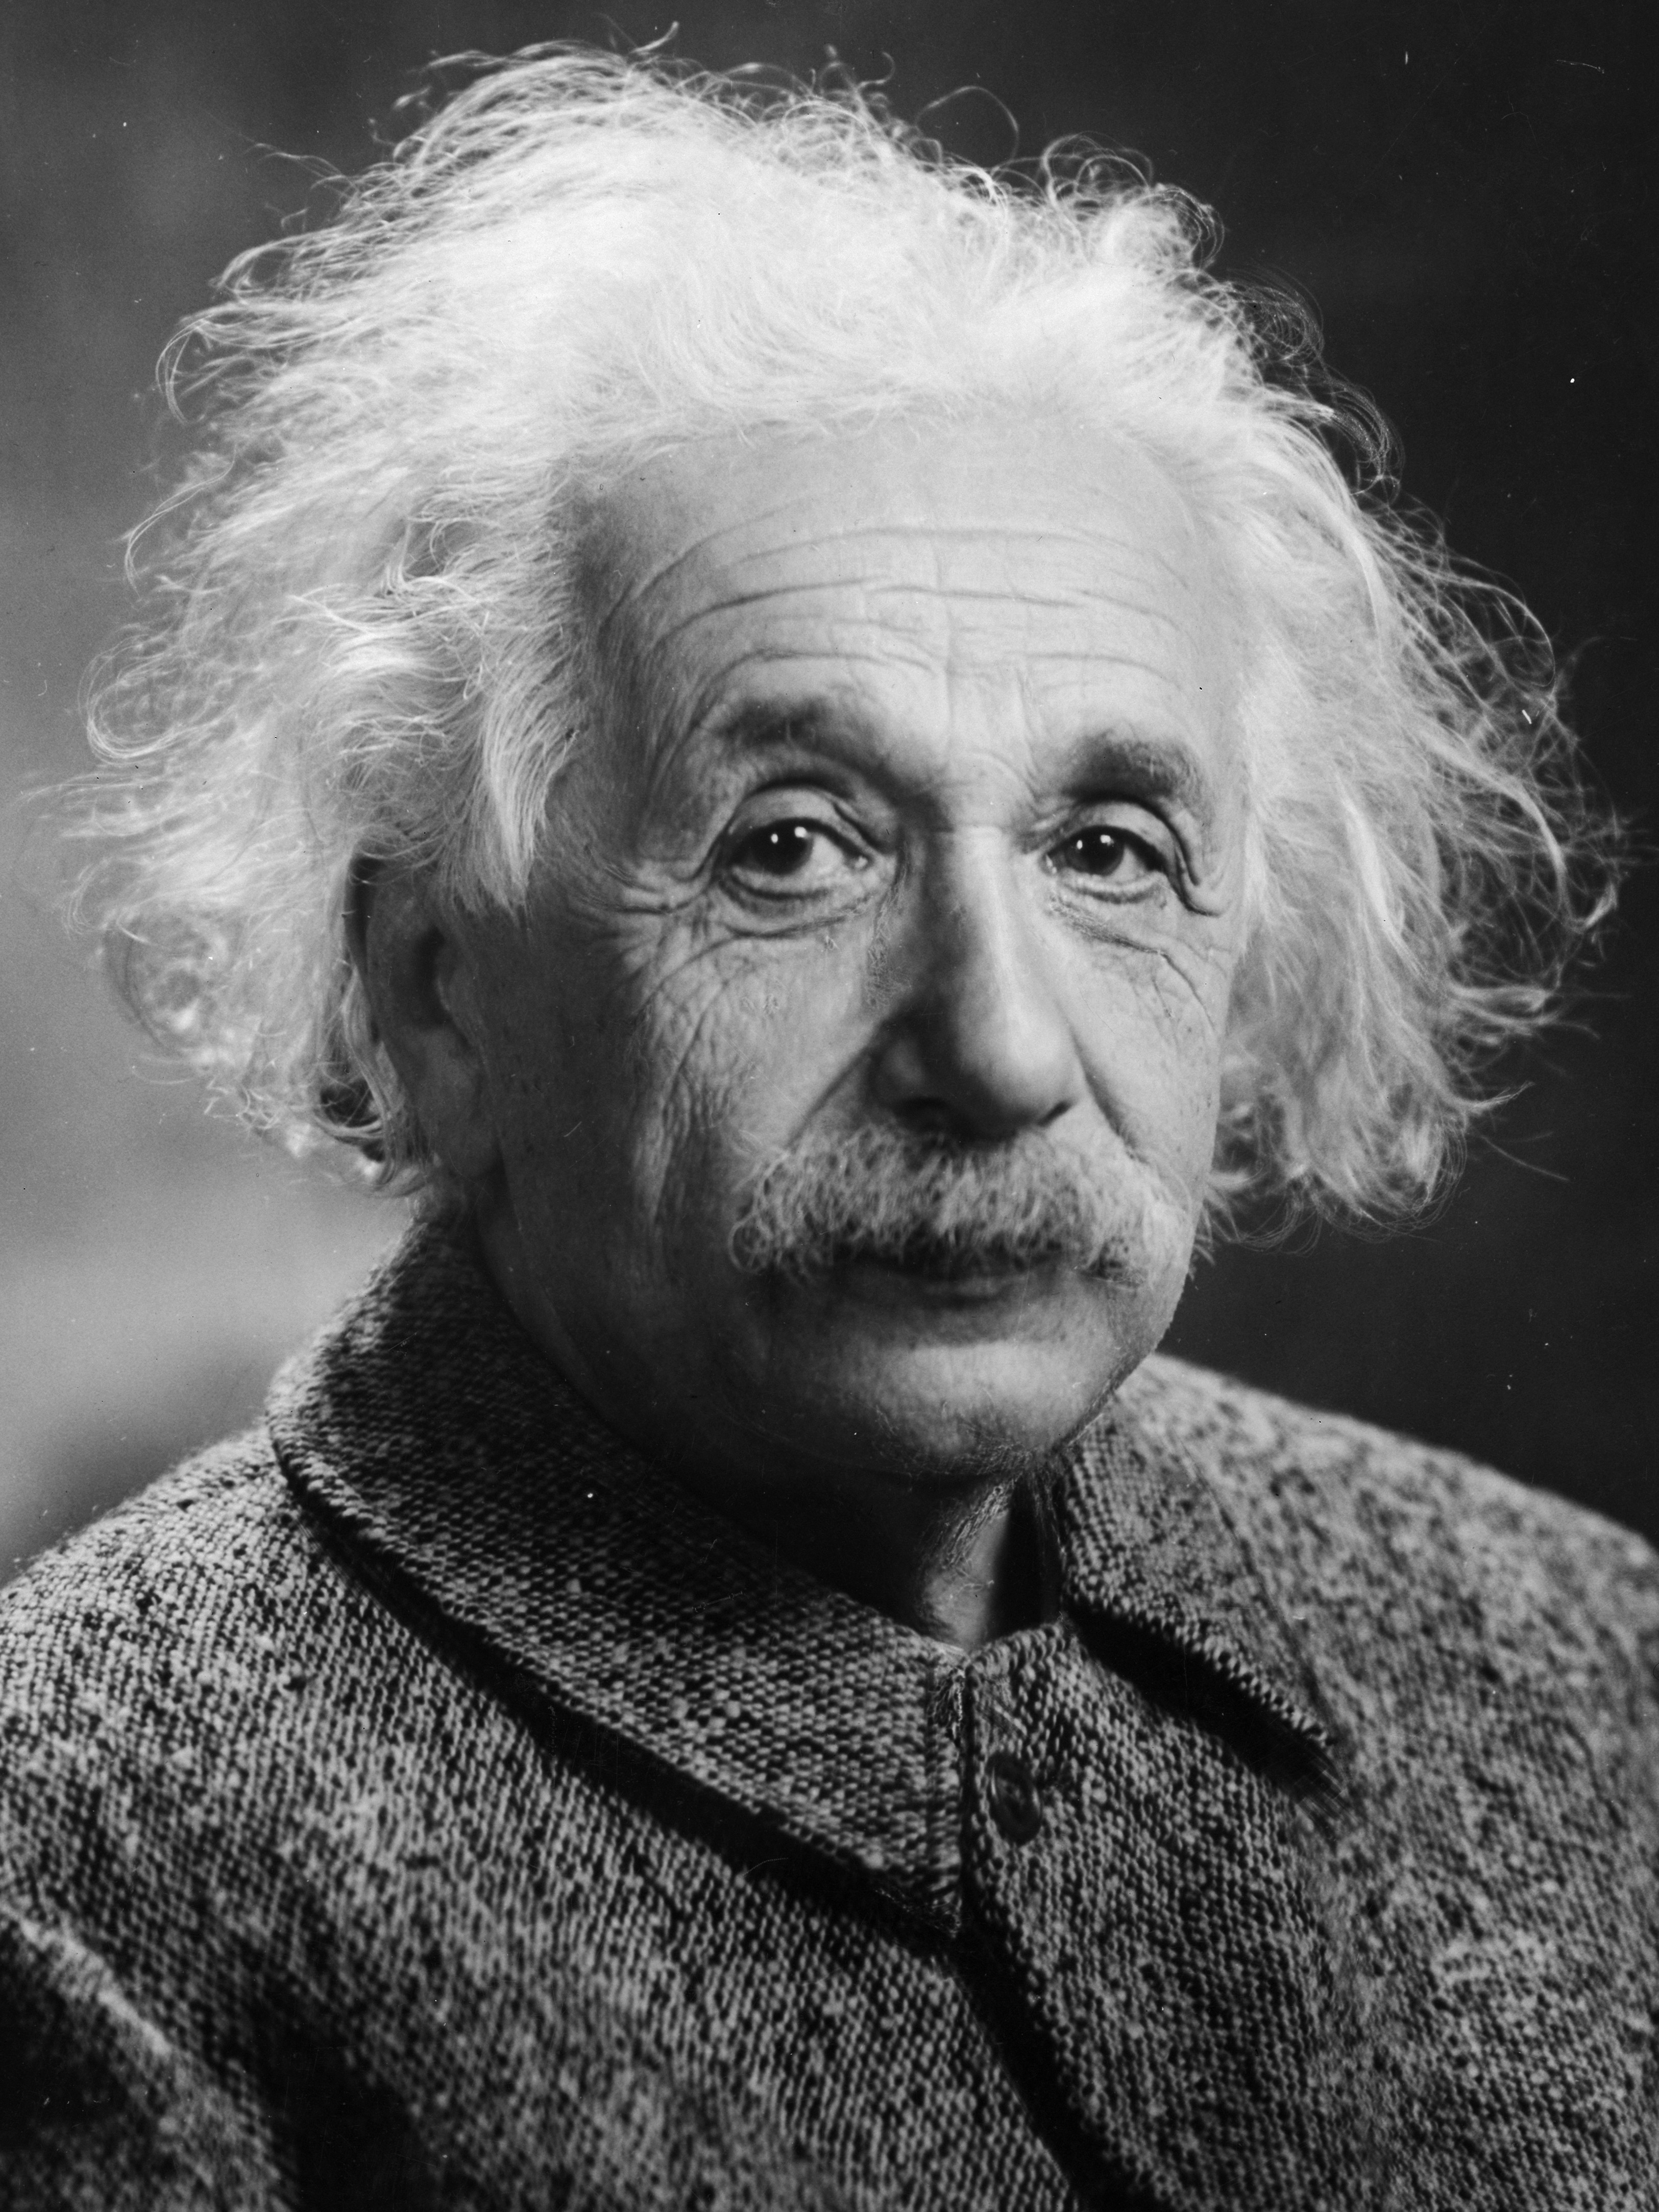
After — the same image converted to ASCII with image_to_ascii('einstein.ppm', width=72):
::::::::::........::......::.:::::::::.........................
::::::::::::......:--:-==+=--::::::::..........................
:::::::::::::..::::-+++*++*##**==--===:.:::....................
::::::::-:::::::::+*++**##%%########***=-:...::::..............
::::::----::::--=++*##%#########%%%#######++==------............
::::::---:==-++++*#%%%%%%%%%%%%%%%%%%%%%##########*+=..........
::--------+++***####%%%%%%####%%#%%#%%%%####%%%%%%#*++:::......
--------===+++***#%%##%%%###########%%#####%%##%%#####-:::....
-------====+##*#######################################+--:....
---------+==+**##########*************############**#####*.:..
-------=+=+*######*******==++++*****###############***#**##-...
======+==********+==+***+=-==+++****##############****###**#+-:
========+++++*******#**++-:--====++**#############*****###***=-:
========+++****###++**++=--:--==+++**##############***********+-
=====+++++++*****+===+*+=--::---====+*#############***###*****+-
====+*+***##*+*++*===+*++--:::--:.:::-=**####**==+++**##*******+
++++++++*#****+===---+*+=--:::--=::::-.:-=***=-....-=**##***+*+-
++++**********+++----=*+---::::-:..:-:-:::*#+=::-=+=++****+#*++=
+++++++**##****-.:::--=-:::-===-::--++=-::+##***+=+=-*#*+++*#++:
++=++==++*+***+-.:.........-========++=-::-*###+=+****+++++***=-
====+==+=+++**+=-...:......:-=++++++*+--::-+#*##******=++=++*+==
===+++==*+**+*==-...........-==+++++++:  .-+*#**#*****=====++*+-
=====++++*++++=:--.::.......:--==+++=..:...-+**=*#****==-=+++=+:
==========+=+*+=-:.........:-:.:=++=---:.. ..+***=***=:-+=++=+*:
=====++++++++++=+=:.........-:.:---=------=====****+++::--++-:-
===+++++++++++++++:  ...........::--::-:.-:--:-=++**+:.:........
+++++++++********=..  ..............      ....-::=++-.........
+++++++++++++**--:         .... .....:::---===++=--.........
+++++++++===**-...                ..::-==+++***+-++**+:.......
+++======-=++-:...                  ...::--:-=---=+++=*++++=-.
+==---:-+++=-:=:                          ....:-----=+=--===+++
=--:-+**+**+-. .::.. .                   .:-: .:-=----==-=+--==
You define what "done" looks like. nWave writes the code to get there.
Step 1 of 5: Inspect the starter project (~2 minutes)
After running setup, cd tutorial-ascii-art and activate the virtualenv:
cd tutorial-ascii-art
source .venv/bin/activate
Windows users: Replace
source .venv/bin/activatewith.venv\Scripts\activate.
What's inside:
tutorial-ascii-art/
  src/ascii_art/__init__.py    # Empty — this is what nWave will implement
  tests/test_ascii_art.py      # 3 acceptance tests (already written for you)
  tests/fixtures/diagonal.ppm  # 4x4 test image (white diagonal on black)
  pyproject.toml
Run the tests to confirm they fail:
pytest tests/ -vFAILED test_ascii_art.py::test_converts_image_to_ascii_with_correct_width
FAILED test_ascii_art.py::test_output_uses_only_density_characters
FAILED test_ascii_art.py::test_bright_pixels_produce_dense_characters
3 failedThat's your first result — red tests that define the feature. Three behaviors, fully specified:
- Correct width: Convert with
width=20, every line is exactly 20 characters - Valid characters: Output uses only the density ramp
" .:-=+*#%@" - Brightness mapping: White pixels → dense chars (
@,#), dark → sparse (.)
You don't need to tell nWave how to implement it — just what the result must look like.
Next: you'll hand these red tests to nWave and watch it turn them green.
Step 2 of 5: Let nWave Deliver (~8 minutes)
AI output varies between runs. Your code will differ from the examples below. That is normal. We define success by what the code does (tests pass), not what the agent says.
Open Claude Code and start the delivery:
claudeThen type this Claude Code command (not a terminal command):
/nw-deliver "Image-to-ASCII art converter using PPM format"Reading the output
The delivery runs through several phases. Here's what you'll see and what it means:
Phase 1 — Roadmap (~30 seconds)
● nw-solution-architect(Fill roadmap skeleton)
  ⎿  Done (3 tool uses · 9.8k tokens · 25s)
The @solution-architect reads your tests and creates a step-by-step plan. You'll see it create docs/feature/*/roadmap.json, then a reviewer validates it.
Phase 2 — TDD Execution (~5 minutes)
● nw-software-crafter(Execute step 01-01)
  ⎿  Done (10 tool uses · 17.0k tokens · 1m 14s)
Each step follows the TDD cycle: write a failing test (RED), implement minimal code (GREEN), commit. You'll see this repeat 2-3 times — once per function the architect planned.
Phase 3 — Refactoring (~1 minute) Systematic cleanup: naming, duplication, structure. The crafter applies progressive refactoring levels (L1-L4) across all modified files.
Phase 4 — Review (~1 minute)
● nw-software-crafter-reviewer(Adversarial review)
  ⎿  Done (8 tool uses · 13.6k tokens · 42s)
An independent reviewer checks code quality and tests for common anti-patterns. If issues are found, they get fixed automatically.
Phase 5 — Mutation Testing (~2 minutes)
Small mutations are introduced in the code (e.g., changing > to >=). If your tests catch them, good. The gate requires 80%+ kill rate.
Phase 6 — Finalize (~30 seconds) Archives the feature and creates an evolution document.
Messages you can safely ignore
You'll see lines like these throughout — they're normal internal coordination:
⎿  PreToolUse:Task hook error     ← DES validation checkpoint (normal)
⎿  DES_MARKERS_MISSING: ...       ← Occasionally appears on first try, auto-retries
These are the Deterministic Execution System (DES) ensuring every step follows the TDD protocol. Think of them as quality gates, not errors.
Troubleshooting
| Symptom | Fix |
|---|---|
| No output for 2+ minutes | Check Claude Code status bar — a pulsing indicator means the agent is still working |
| Tests still failing after delivery | Run /nw-deliver again — it resumes from where it left off |
| Agent errors out mid-delivery | Type /nw-deliver again — it picks up the existing roadmap |
| Want to start completely fresh | git stash && git checkout main then re-clone |
Next: you'll run the tests and try the converter yourself.
Step 3 of 5: See the Result (~1 minute)
When delivery completes, you'll see a summary table. Run your tests:
pytest tests/ -vExpected:
test_ascii_art.py::test_converts_image_to_ascii_with_correct_width PASSED
test_ascii_art.py::test_output_uses_only_density_characters PASSED
test_ascii_art.py::test_bright_pixels_produce_dense_characters PASSED

3 passed
All green. Now try the converter on the test fixture:
PYTHONPATH=src python3 -c "
from ascii_art import image_to_ascii
print(image_to_ascii('tests/fixtures/diagonal.ppm', width=40))
"
You should see a small ASCII diagonal — bright characters along the diagonal, dark everywhere else.
If you see
ModuleNotFoundError: Make sure your venv is activated and you includedPYTHONPATH=src.
Next: you'll try a more interesting image and explore the output.
Step 4 of 5: Explore (~2 minutes)
Create a gradient image and convert it:
PYTHONPATH=src python3 -c "
width, height = 32, 16
with open('gradient.ppm', 'w') as f:
    f.write(f'P3\n{width} {height}\n255\n')
    for y in range(height):
        row = []
        for x in range(width):
            v = int(255 * x / (width - 1))
            row.append(f'{v} {v} {v}')
        f.write('  '.join(row) + '\n')

from ascii_art import image_to_ascii
print(image_to_ascii('gradient.ppm', width=60))
"
You should see a smooth ramp from spaces on the left (dark) to @ signs on the right (bright):
.:-=+*#%@ .:-=+*#%@ .:-=+*#%@ .:-=+*#%@ .:-=+*#%@ .:-=Look at the git log to see how nWave built the code:
git log --onelineabc1234 green(ascii-art): implement brightness mapping
def5678 green(ascii-art): implement character validation
ghi9012 green(ascii-art): implement width conversionEvery commit maps to a TDD step. You can trace exactly how the code was built.
Next: a recap of what nWave did for you.
Step 5 of 5: What Just Happened (~1 minute)
You started with 3 failing tests and an empty __init__.py. nWave delivered:
- A roadmap breaking the feature into implementation steps
- Production code built through strict TDD (every test was red before green)
- Refactored code checked against progressive quality levels
- Peer review by an independent reviewer agent
- Mutation testing validating your test suite catches real bugs
- Atomic commits at every green step — traceable via
git log --oneline
What You Didn't Have to Do
- Write the implementation
- Figure out how to parse PPM files
- Map pixel brightness to ASCII characters
- Write unit tests (nWave wrote them from your acceptance tests)
- Review your own code (the reviewer agent did it)
- Validate your test suite (mutation testing did it)
You defined "done". nWave delivered it with engineering discipline you'd expect from a senior team.
Next Steps
This tutorial used /nw-deliver directly — you wrote the acceptance tests by hand. The full nWave workflow has specialized agents for every stage:
| Wave | What it does | Guide |
|---|---|---|
| DISCUSS | Requirements gathering with AI product owner | Tutorial: DISCUSS wave |
| DESIGN | Architecture decisions with AI solution architect | Tutorial: DESIGN wave |
| DEVOPS | Infrastructure readiness with AI platform architect | Tutorial: DEVOPS wave |
| DISTILL | Auto-generate acceptance tests from requirements | Tutorial: DISTILL wave |
| DELIVER | TDD implementation (what you just did) | This tutorial |
Each guide is ~5 minutes and builds on the previous one. By the end, you'll know the complete workflow.
Last Updated: 2026-02-17